


Post updated September 2022
* In this post, when I use the term Screen Options (uppercase), I am referring to the Screen Options API, the framework, the class etc. When I use the term screen options (lowercase), I am referring to the options available on the admin screen.
Customising the display of pages in the WordPress admin
Screen Options are most frequently dismissed and ignored — it’s more visual noise on the page that, since you don’t frequently interact with it, you forget it exists. But it serves a valuable function in WordPress: the ability to customise the display of any page in the WordPress administration. This is a powerful yet rarely used customisation benefit built into WordPress.
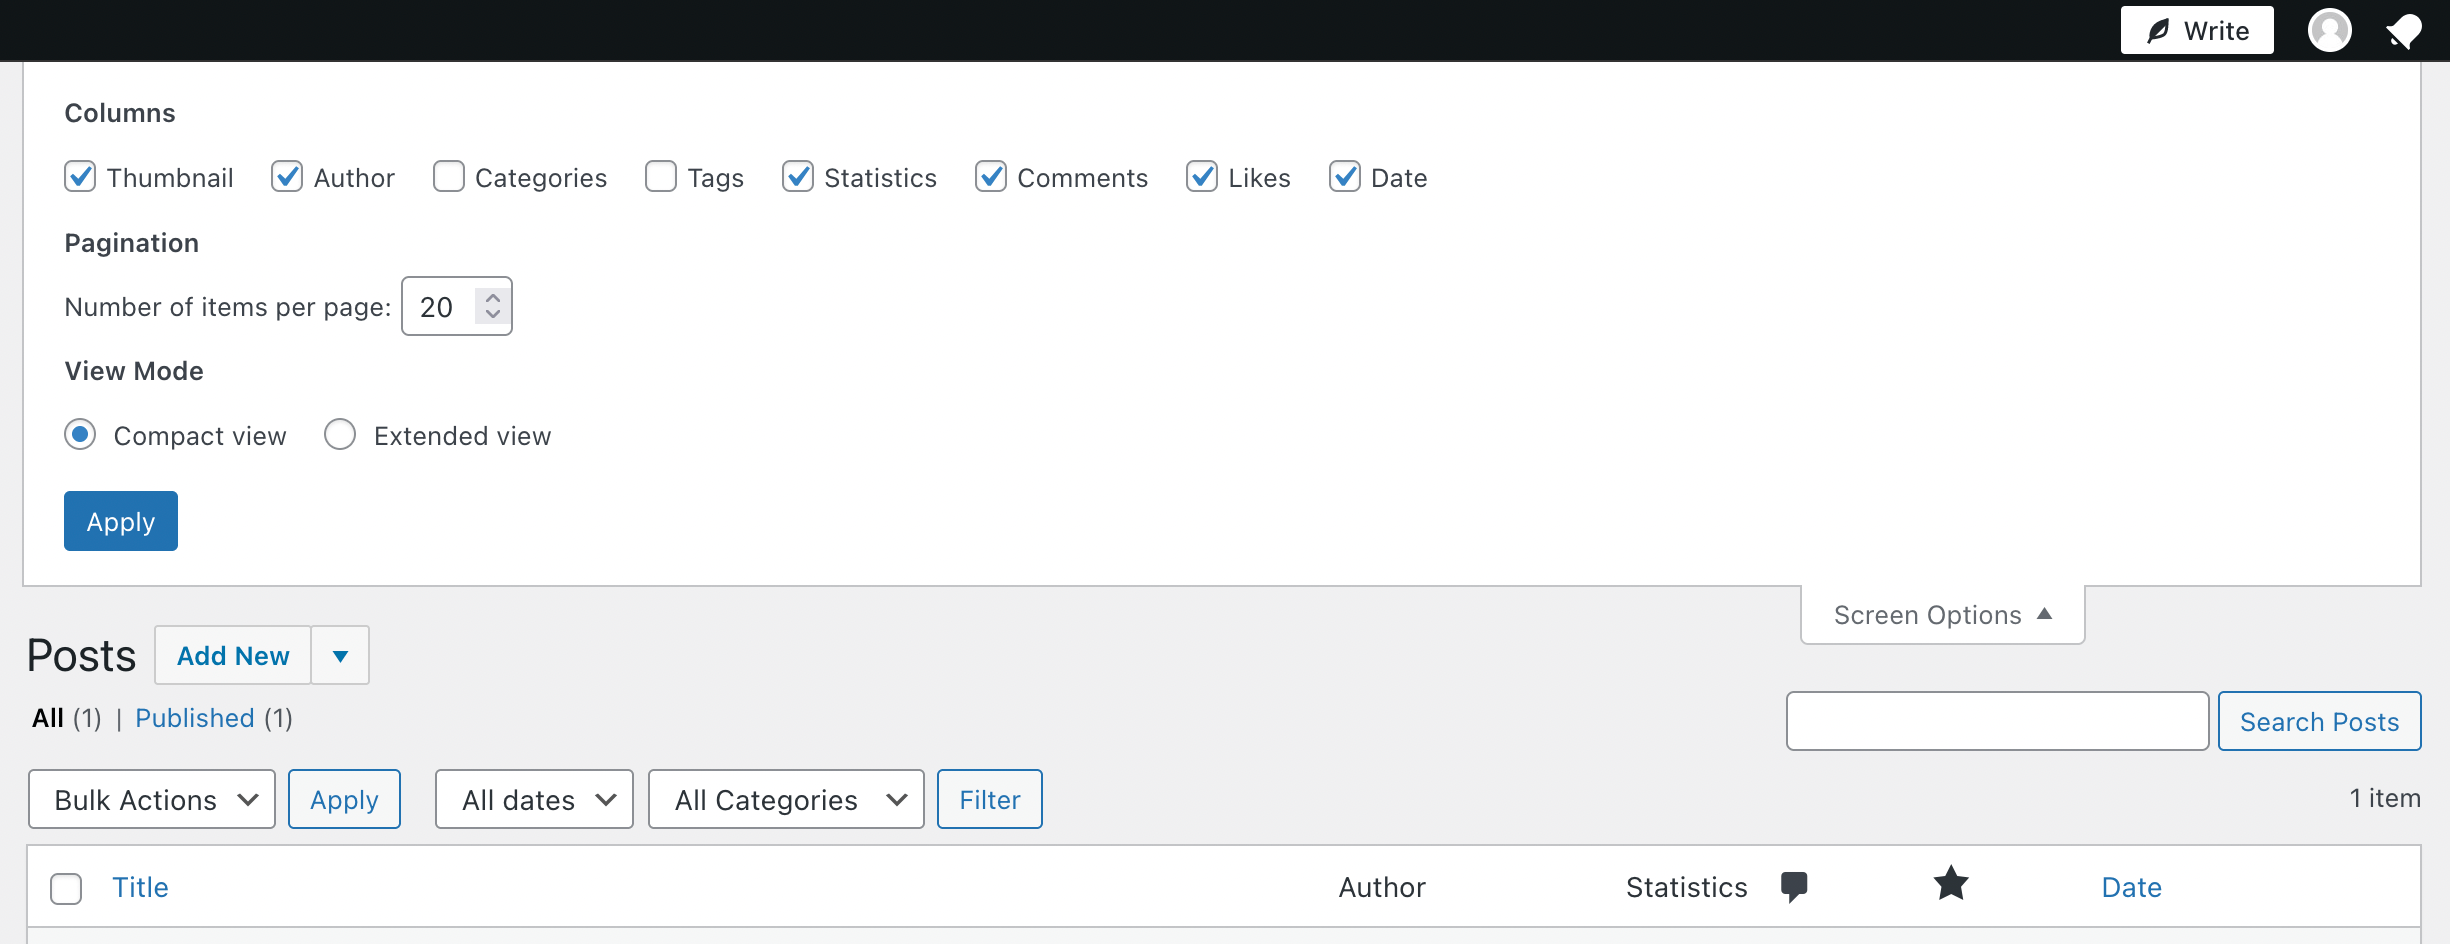
If you’re unfamiliar, the Screen Options tab appears at the top right of most pages in the WordPress admin. What it does varies depending on the page you are on, but generally, it allows you to customise the way information appears in the admin. For example, on the All Posts page, you can change what columns appear in the post list and how many posts per page to display. On the Edit Post screen, you can toggle the display of the meta boxes. It sits next to the Help tab but, unlike the Help tab, most pages have a Screen Options tab by default, whereas many plugins lack their own unique Help tab.
While working on a client project recently, I built a plugin that was designed to track data from disparate sources. The plugin needed to:
- Add an admin page to display data about various sites maintained by the client;
- Collect the data from API endpoints on those sites, and store it in a single place so the values could be compared across many sites in one location;
- Display the information in an admin screen via “widgets” styled to match the dashboard widgets native to WordPress (using the same classes and styles);
- Allow the user to show and hide these widgets in order to give them more control over the experience and select those widgets that are most relevant to them.
Since this last piece is exactly what Screen Options are for, I set out on a path to implement custom screen options in my plugin.
Here’s the problem: besides some very basic documentation on what Screen Options are in the user handbook, and cursory descriptions of the add_screen_option() function in the Developer Code Reference and WordPress Codex, there isn’t much information available.
There have been a few very good blog posts written about hooking into the Screen Options tab by Pippin Williamson and Joe Dolson. Both of those cases use the per_page option type — which is usually used to determine how many posts to display on a particular admin page. I wanted to toggle options ON or OFF with a checkbox and I knew it was possible: it’s literally what you see when you open the Screen Options tab on any edit page in WordPress. Yet, even here, no documentation was readily available.
I decided to experiment and built a class (a variation of which I’ve put on GitHub for you to fork, download, or use) to handle all functionality for my custom Screen Options.
Working with Screen Options
The first thing you need to do when working with Screen Options is to register your screen options like anything else in WordPress. Almost all the documentation (including the documentation in the Codex) will give you an example where you pass per_page as the first value to add_screen_option. The Developer Reference page on add_screen_option says that that value is “an option name” but gives no further guidance.
The truth is that this value can be anything you want. It’s just an identifier for the option you want to store and it’s used when you interact with the WP_Screen object to retrieve your options.
The second parameter of add_screen_option is the data you want to save. Again, this can be literally anything. The only limitations are the needs of your project. This gives you an incredible amount of power and control over how you want your screen options to work.
In my case, I created a custom ID that was unique to each option, and the arguments I passed were the option name and a default value. I looped through each option individually, and added it with something like this:
add_screen_option( "wordpress_screen_options_demo_$option_name", [
	'option'  => $option_name,
	'value'   => true,
] );
All of this gets hooked to the load-$admin_page action, where $admin_page is the unique page slug of whatever admin page you’re using. When it comes time to display the screen options, I check to see if it’s been saved to user meta first, and if not, I use the default values via the get_option method of the WP_Screen class.
My helper class has a before and after method to handle the HTML markup before and after looping through each option, and the whole thing is hooked to the screen_settings filter which will add it to the screen options tab.
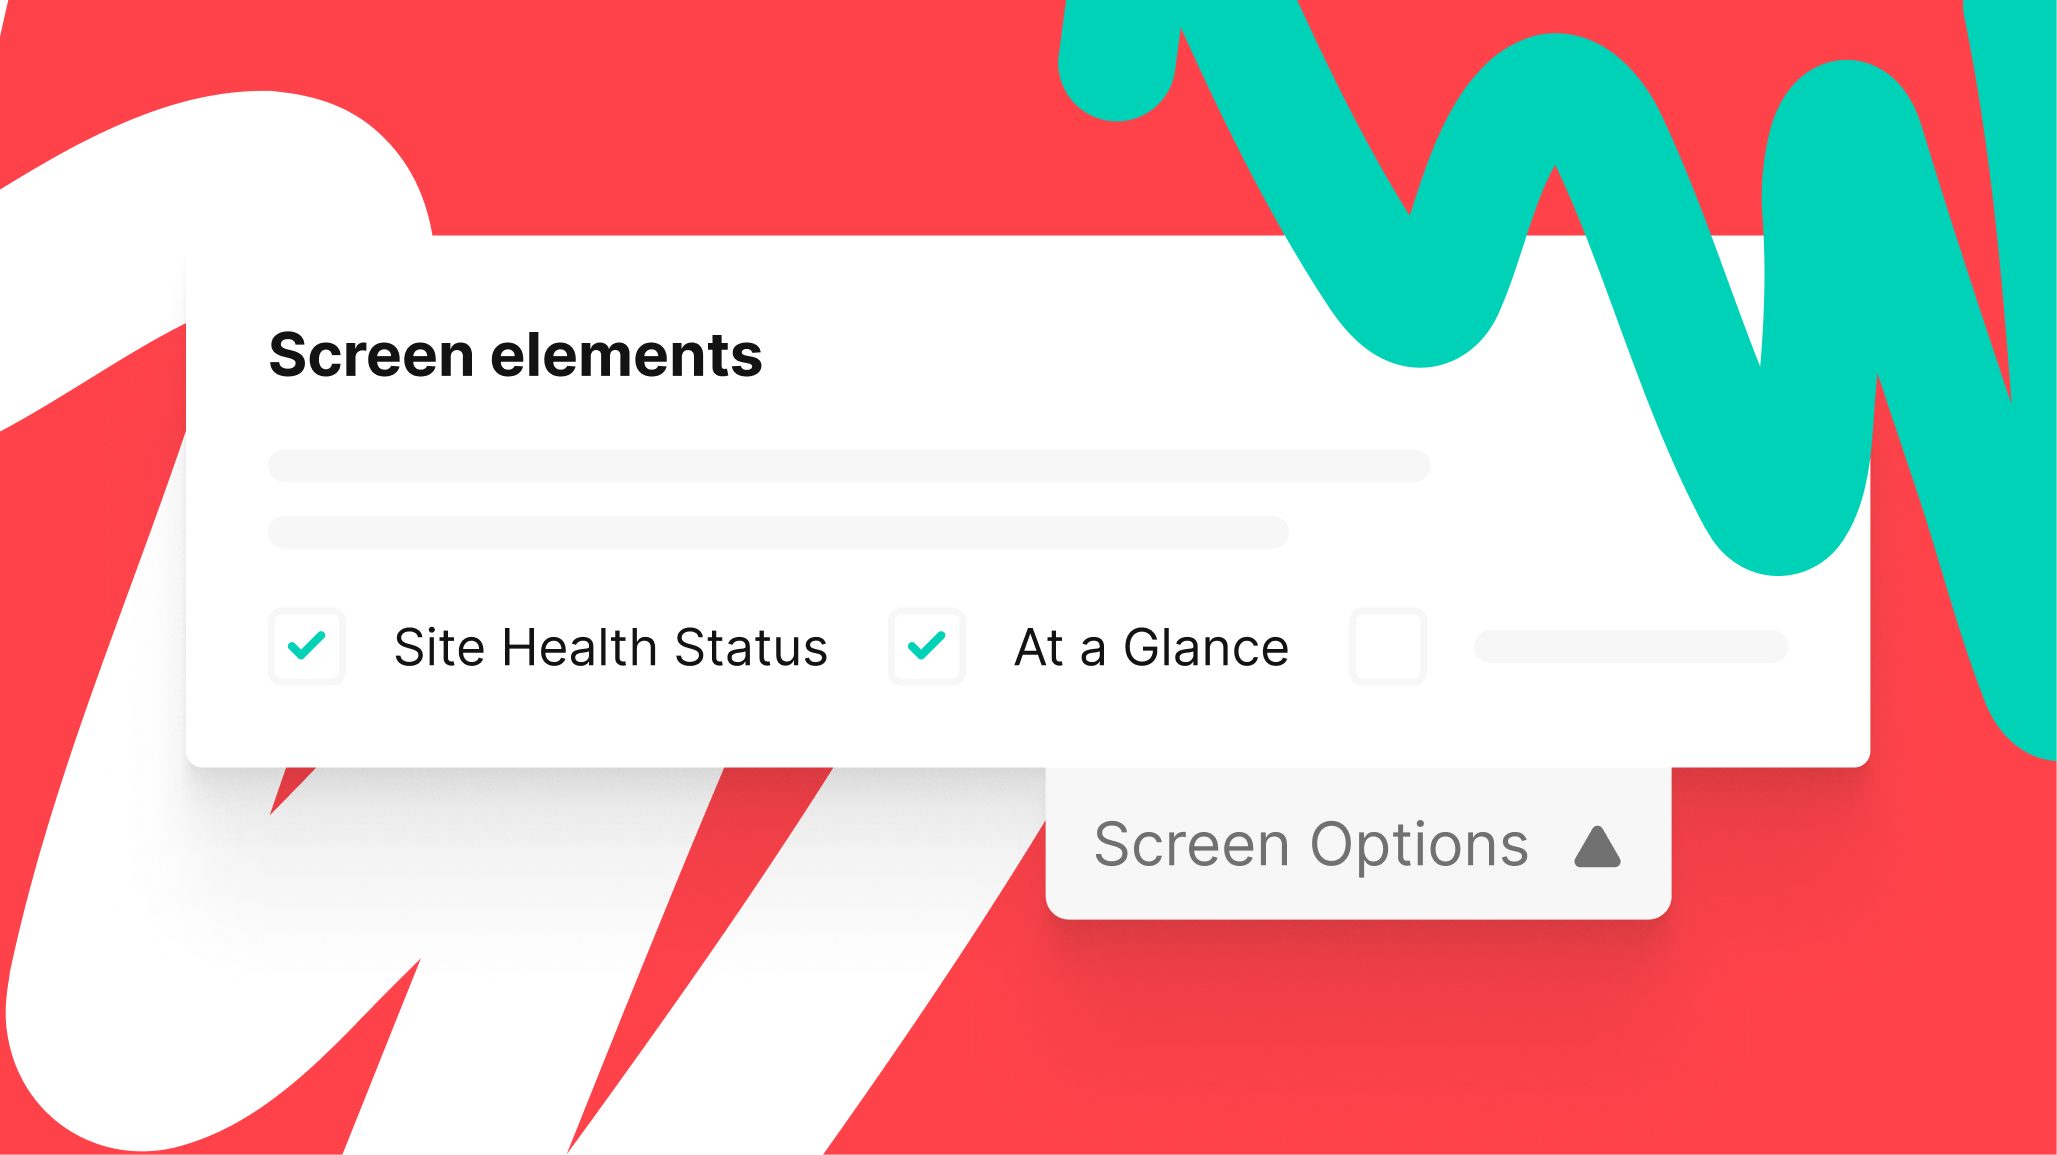
After doing all this, I’ve got something that looks like this:

Screenshot of the Screen Options tab added by the demo plugin.
So I’m left with
- the options,
- the options display,
- and they are unique to my admin page.
But they don’t do anything yet.
In order to make them functional, you need to use the set-screen-option filter to save the screen option to user meta when the Apply button is clicked. Several posts about working with screen options will give some example code like this for working with the set-screen-option filter:
add_filter( ‘set-screen-option’, ‘set_option’, 10, 3 );

function set_option( $status, $option, $value ) {
	if ( ‘my_option’ === $option ) {
		return $value;
	}
}
But as Joe Dolson rightly points out in his post, this won’t work if you are passing more than one option to screen options. If you want to make sure of the data you’re saving, you can still make that check, but default to the original value.
In my case, after handling the security checks, I run the same check but my return value is outside of the conditional: I’m not just returning if the option matches what I’m looking for. This means that other options will still get saved normally.
Using Screen Options
That’s great, but how do you actually use the stuff you’re saving to screen options?
Once screen options are saved, they’re stored in user meta. This means that one person’s settings won’t match another person’s settings. This can be a good thing, because how a page displays in the admin can be customised per user. However, if screen options haven’t been saved, the user meta won’t exist, so you need to handle the default display as well.
In the WordPress Screen Options Framework repository I built, I created a plugin to demonstrate how the options work and how you might interface with those options. You can also see an example of what working with saved options versus the defaults might look like in the examples above.
The plugin adds an admin page for the screen options to be tied to, then simply loops through and displays the value for those options. If they haven’t been saved, the plugin displays a message to explain it’ll use the default values and displays those values; but as soon as they are saved, it pulls from the user meta and displays the custom user values.
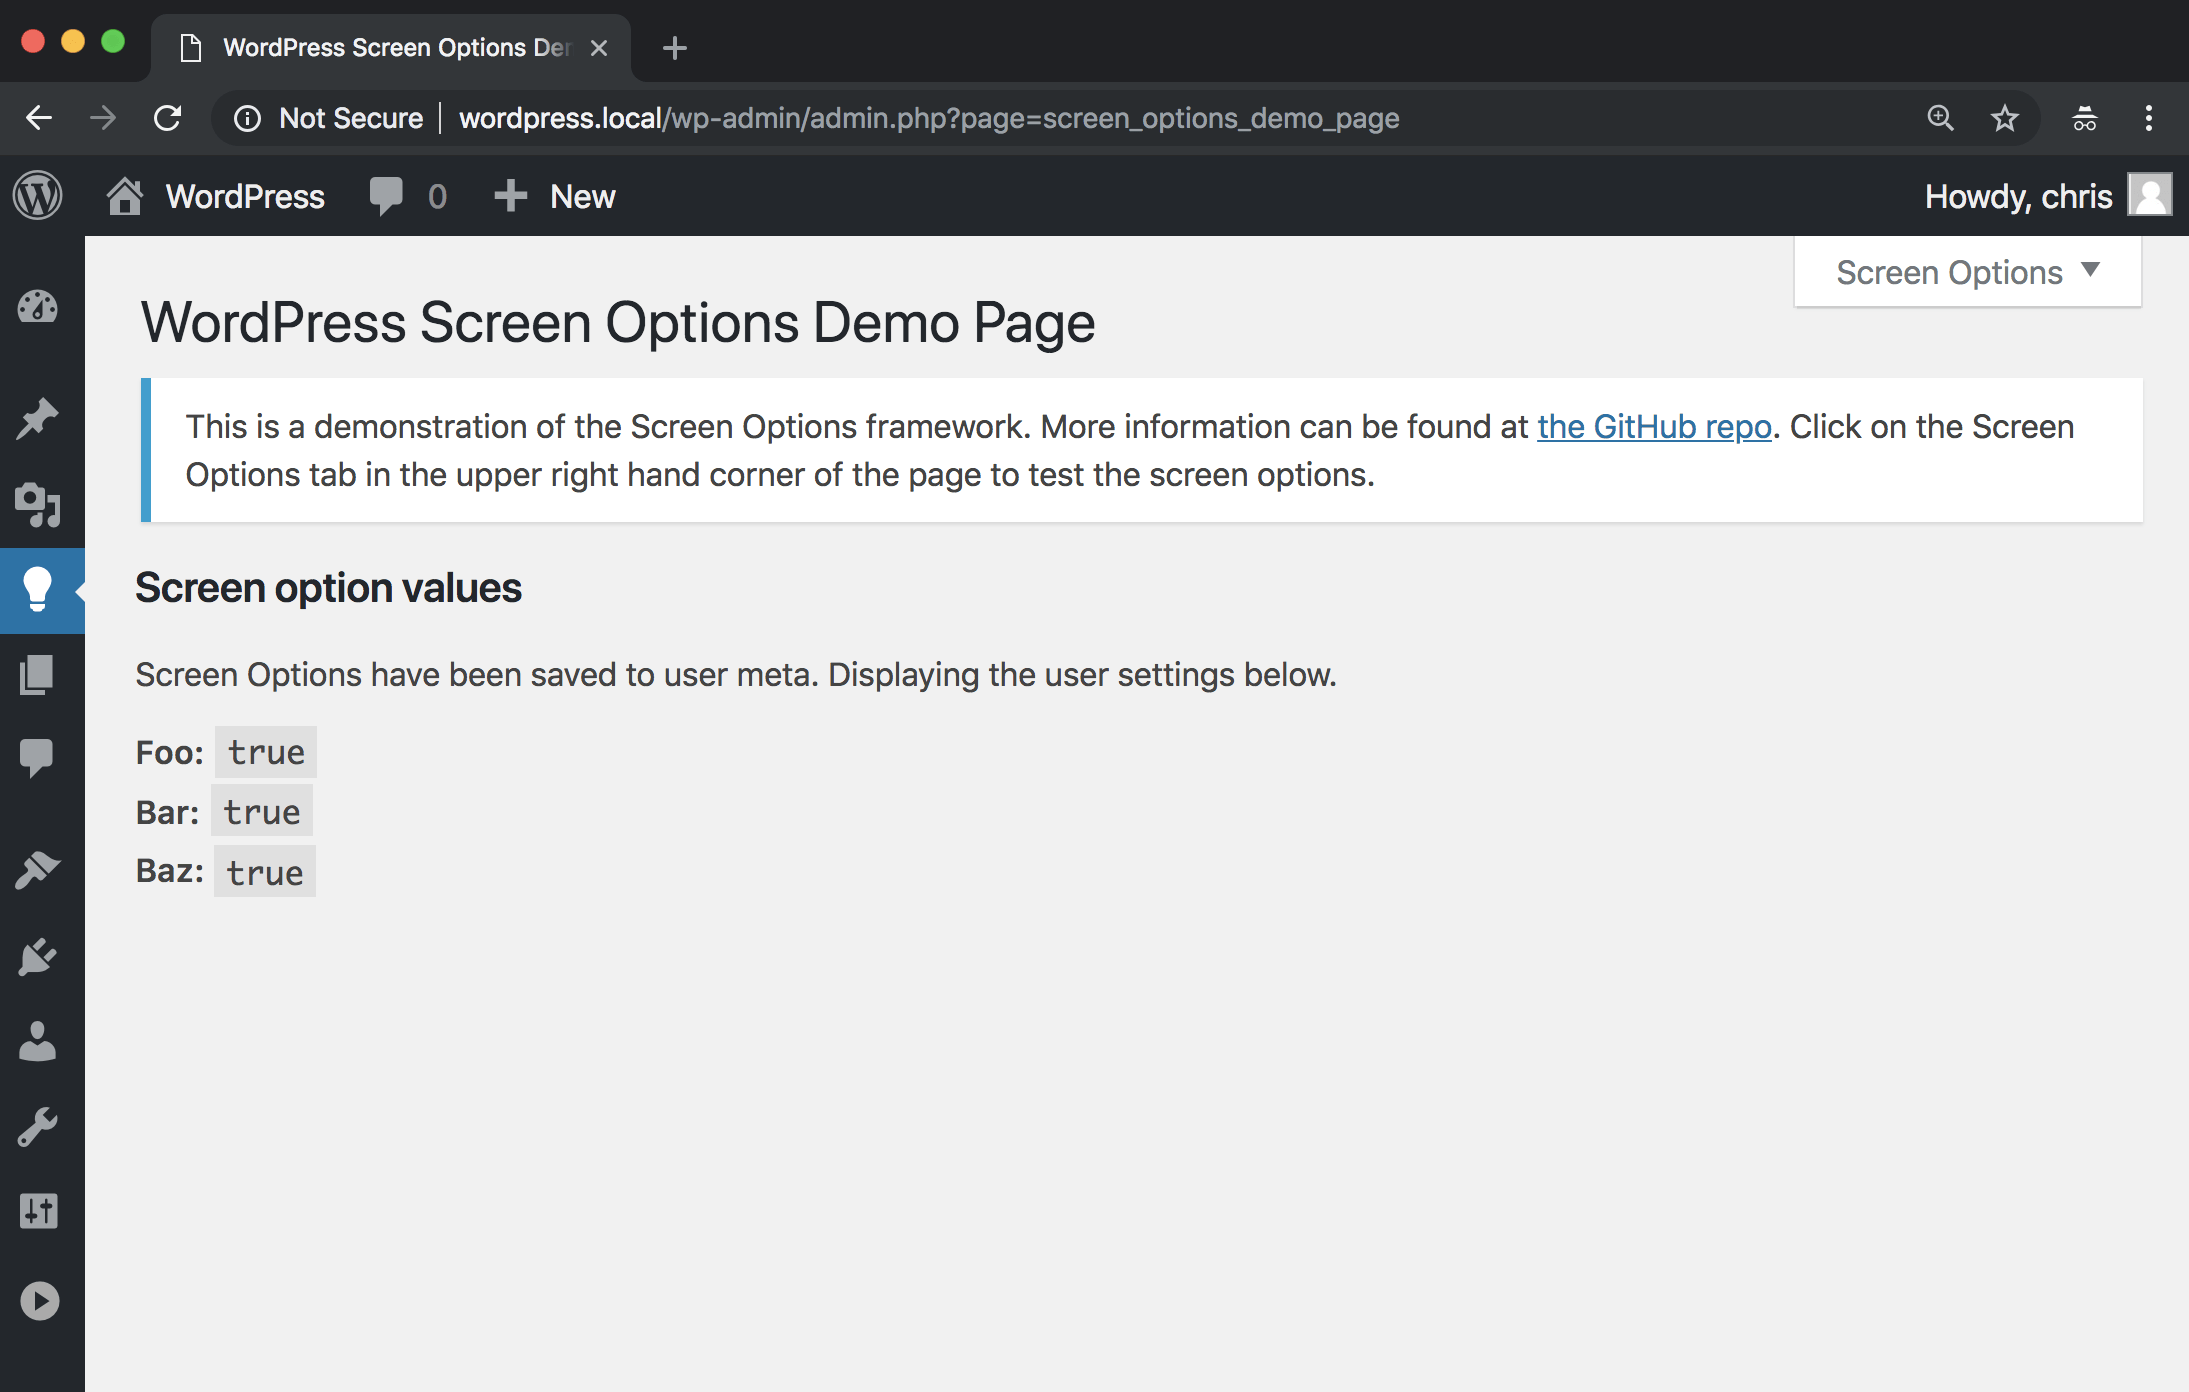
The admin page added by the WordPress Screen Options Framework demo plugin.
I was just using checkboxes to toggle things ON or OFF, but you could put any kind of input field in Screen Options that you want. You could even use a JavaScript library like Select2 or Chosen to render better select boxes (if you cared enough to load an extra JavaScript library just for the Screen Options tab). Once you have your screen options, it might be helpful to let your users and clients know it’s there, either in your documentation, or with an announcement pointing out the Screen Options tab.
A powerful new tool
Example of the Screen Options Framework demo plugin in action.
One thing to note about the Screen Options tab is that it is only visible on larger screens (larger than 782 pixels wide). This means it will be hidden on older tablets and phones. This seems like an oversight to me, but it can be added back easily with custom admin styles.
Due to the limited documentation, it’s hard to really dig into the guts of the Screen Options API. But hopefully with the information and examples in this post and in the Screen Options Framework, you will take another look at Screen Options and use them to add customisation controls for your next project.
Human Made is the technology partner of choice for the world’s leading brands.